
Learning Photography Course — 6. Lighting
Module 6 of the Learning Photography Course. Everything that happens to light before it reaches the camera — which is the half you can actually change.
Light arriving at a subject has four properties and every lighting decision anybody makes is one of them: intensity, direction, colour and quality. 'Quality' has a bad name, because it sounds like a judgement and it is in fact pure geometry — and this module states in one sentence exactly what controls it.
The sun is 1.4 million kilometres across and is, photographically, a SMALL light. NASA's own Sun Fact Sheet puts its apparent diameter from Earth at 1,919 arcseconds on average — about half a degree — and that half a degree is why a midday shadow has an edge you could cut yourself on. Put a cloud layer over it and the source becomes the whole dome of the sky: the largest softbox ever built. Golden hour is a change in the light, not a dimming of it, and the module separates the three things that change at once.
Then: why moving a light closer softens it (the box did not change, its angular size did), what direction does to apparent shape, and colour temperature — including why low kelvin values are the ones we call warm, which is the exact opposite of the emotional language and is not going to change.
Speedlights as a capacitor discharging through xenon rather than a bright lamp, and everything that follows from that. Guide number as a definition rather than a measurement. Sync, and the banded frame — which is not a fault but a photograph of a moving slit, taken by a light too quick for it. High-speed sync, and the two or three stops it costs. First and second curtain, and the difference between a car that appears to be reversing and one that is moving.
The inverse-square law, derived in one diagram, with the part people get wrong: falloff is violent close in and gentle far away, which is why a light placed close darkens the background for free and a light placed far away evens everything out. Distance decides falloff, and falloff is the one thing you cannot fix afterwards.
Every studio modifier in existence does one of exactly two things — change the apparent size of the source, or restrict where the light goes. The module says so once and the catalogue becomes a list of instances.
And the assembly: one light first, then fill and the ratio between them, then rim, then background — and balancing flash against daylight, where the shutter controls the ambient and does nothing at all to the flash.
No guide number, sync speed or flash duration is quoted for any named product, because each belongs to one unit on one day rather than to a technology.
Educational documentary. Not financial or investment advice.
In these topics
Video notes
1. 1 What light does before it reaches the camera
Every module so far has been about what happens to light after it arrives — how a lens bends it, how an aperture meters it, how a sensor counts it. This module is about the half that happens first, and it is the half you can change.
A photograph is not a picture of a thing. It is a picture of light that has bounced off a thing. Change the light and you change the photograph, without touching the subject at all.
Light arriving at a subject has four properties, and every lighting decision anybody makes is one of these four. Its intensity — how much there is. Its direction — where it comes from. Its colour — what part of the spectrum it carries. And its quality — whether the shadow it casts has a sharp edge or a gradual one.
That last one has a bad name. "Quality" sounds like a judgement about how good the light is, and it is not. It is a purely geometric property, and by the end of chapter three you will be able to state exactly what controls it in one sentence.
When light hits a surface it does one of two things, and most surfaces do both. It reflects specularly — bouncing off at the same angle it arrived, like a mirror — or it reflects diffusely, scattering in every direction.
A polished chrome kettle is almost entirely specular. A sheet of matte paper is almost entirely diffuse. Skin is both: a diffuse base with a specular sheen on top, which is why a portrait can look either luminous or greasy depending on nothing but where the light is.
Here is the practical consequence. A diffuse reflection looks the same from every angle, so moving the camera does not change it. A specular reflection is only visible from one angle, so moving the camera an inch can make a highlight appear or vanish. When photographers talk about "killing a reflection", they are moving either the light or themselves out of that one angle.
And the last idea in this chapter is the one people find hardest to accept: you light the subject, not the scene.
It is tempting to think of lighting as illuminating a room. It is not. The camera records what reaches the sensor from each part of the frame, and that means light that falls where the camera is not looking has done nothing at all, however bright the room feels to stand in.
A single small light aimed at a face, in an otherwise dark room, can make a technically excellent photograph. A room lit evenly to a comfortable brightness very often makes a flat one. Brightness is not the goal. Where the light falls, and where it does not, is the entire craft.
2. 2 The sun as a light source
The sun is a ball of plasma one point four million kilometres across. It is also, photographically, a small light — and the reason why is the single most useful fact in this module.
What matters is not how big a light is. It is how big it looks from where the subject is standing — its angular size.
NASA's own Sun Fact Sheet gives the sun's apparent diameter from Earth as one thousand nine hundred and nineteen arcseconds on average, varying between one thousand eight hundred and eighty-seven and one thousand nine hundred and fifty-two as the Earth moves between perihelion and aphelion. Converted — and this conversion is our own arithmetic from NASA's figures — that is about half a degree, from roughly nought point five two four to nought point five four two.
Half a degree. Hold a pencil at arm's length and the sun is narrower than the wood.
So at midday, with a clear sky, you are lighting your subject with a source that subtends half a degree. That is why a midday shadow has a hard, sharp edge you could cut yourself on. It is not because the sun is bright. It is because it is small.
Now put a cloud layer over it. The sunlight scatters through the water droplets and re-radiates from the entire dome of the sky. The source is no longer half a degree across; it is a hundred and eighty degrees across. An overcast sky is the largest softbox ever built, and it is free, and it is why portrait photographers quietly welcome grey days.
Golden hour is the one that gets misunderstood. As the sun drops towards the horizon its light travels through far more atmosphere, and the atmosphere scatters short wavelengths more than long ones — the same effect that makes the midday sky blue takes the blue out of the direct beam and leaves the red.
So golden hour light is warmer. But it also arrives at a low angle, which rakes across surfaces instead of falling onto them, and picks out every texture. And the sun's disc is often softened by haze near the horizon. Three changes at once, and only one of them is about colour.
The light changes. It does not merely dim. That distinction is the whole reason people set an alarm for it.
After the sun sets, the direct beam is gone and the only light is the sky itself — blue, enormous, and very soft. Blue hour is a different light source, not a darker version of the last one, and it lasts about twenty to forty minutes depending on latitude and season.
3. 3 Hard and soft light
Here is the sentence promised in chapter one.
The only thing that makes light soft is the apparent size of the source as seen from the subject.
Not the power. Not the distance on its own. Not whether the bulb is frosted. Apparent size, which is an angle.
The reason is geometry, and it is worth seeing rather than being told. A shadow edge is the boundary between the part of a surface that can see the whole light and the part that can see none of it. If the source is a point, that boundary is a line — there is nowhere that sees half the light. If the source is large, there is a band where the subject sees part of the source and not the rest, and across that band the shadow fades gradually.
That band is called the penumbra, and its width is what everybody means by soft light.
Which gives the working rule people use all day without knowing why. Move a light closer and it gets softer. Not because proximity is magic, but because a softbox one metre wide subtends about fifty-three degrees at one metre and about fourteen degrees at four metres. The box did not change. Its angular size did.
The reverse is equally useful. A large light pushed far away hardens, and eventually behaves like the sun. There is no such thing as a soft light — only a light that is soft at a distance.
It also means a diffuser only softens if it makes the emitting area bigger. Putting a piece of white plastic across the front of a small flash and leaving the flash where it is changes almost nothing, because the plastic is the same size as the flash. Bouncing that flash off a ceiling makes the ceiling the source, and a ceiling is enormous.
How do you choose? By what the subject's surface does.
Hard light exaggerates texture, because every bump casts its own tiny sharp shadow. It flatters an old stone wall, a weathered face, a piece of machinery. Soft light suppresses texture, because the penumbra of each bump overlaps the next. It flatters skin, glassware, anything where the surface detail is not the point.
Neither is better. Both are choices, and the choice is made on the subject rather than on taste.
4. 4 Direction
Intensity says how much. Quality says how gradual. Direction says what shape the subject appears to have — because shape is read from the pattern of light and shadow, and nothing else.
Front light, coming from beside the camera, fills in every shadow the camera can see. It is even, forgiving and safe. It is also flat: with no visible shadows, there is nothing to read depth from, and a face lit straight on looks like a drawing of a face. Direct on-camera flash is the purest form of it, which is why it looks the way it does.
Side light rakes across the surface. Every raised part throws a shadow the camera can see, so texture is at its maximum and form is obvious. Move a light from beside the camera round to ninety degrees and a face acquires a nose, cheekbones and a jaw — none of which have moved.
Back light puts the source behind the subject. If nothing fills the front, you get a silhouette: shape without detail. Ease it round a little off-axis and you get a rim — a bright edge separating the subject from the background, which is the single most effective way to stop a dark subject disappearing into a dark scene.
Top light is what the sun does at midday and what a ceiling fixture does all day. It puts the eye sockets in shadow, which reads as tired or sinister, because in nature light comes from above and we are used to it — but not from directly above.
Bottom light almost never occurs naturally. Firelight, a torch under the chin, the glow of a phone. Because it inverts every shadow we expect, it reads as wrong, which is precisely why it has been the horror-film convention for a century.
The practical version of all this: decide what you want the viewer to understand about the subject's shape and texture, then put the light where that understanding comes from. The answer is very often "a bit to the side and a bit above" — not because that is a rule, but because it is where the sun spends most of the day.
5. 5 Colour temperature

Heat a block of iron. At first it glows dull red, then orange, then yellow-white, then — if you could keep going — blue-white.
That progression is what colour temperature describes. A black-body radiator at a given temperature emits a particular spectrum, and the temperature, measured in kelvin, names the colour. It is a real physical relationship, not a scale somebody invented.
Which produces the oddity everyone trips over. Low kelvin values are what we call warm, and high ones are what we call cool — the exact opposite of the emotional language. Candlelight sits at the low end and we call it warm; an overcast sky sits at the high end and we call it cold. The physics and the vocabulary point in opposite directions, and the vocabulary is not going to change.
The conventional figures, and these are conventions rather than measurements — a real source is rarely a perfect black body, and two tungsten bulbs are not identical:
Candle flame, somewhere around one and a half to two thousand kelvin. Domestic tungsten, roughly two and a half to three thousand. Studio tungsten, around three thousand two hundred. Direct midday sunlight, around five to five and a half thousand. Overcast daylight, around six to seven thousand. Open shade under a blue sky, higher still — eight thousand and up, because the only light reaching the subject is the blue sky itself.
Treat those as a ladder of relationships, not as numbers to memorise. What matters is that shade is bluer than overcast, which is bluer than midday, which is bluer than a bulb.
White balance is the correction. The camera is told what the light is, and it scales the colour channels so that something neutral in the scene comes out neutral in the file. Get it right and white paper is white under any of those sources.
But it is also a choice, and this is where beginners are led astray by the word "correct". A sunset balanced perfectly to daylight loses the reason you photographed it. Setting the white balance warmer than the light makes the picture cooler, and setting it cooler makes the picture warmer — the correction runs opposite to the effect, which catches everybody out at first.
Mixed lighting is the real problem. A room lit by a window and a table lamp has two different colour temperatures in one frame, and a single white balance setting cannot satisfy both. Correct for the window and the lamp goes orange; correct for the lamp and the window goes blue.
There are three honest answers. Turn one of them off. Overpower one with the other. Or gel — put a coloured filter over one source so the two match, then balance for the pair. A warming gel over a flash to match tungsten, or a blue one to match daylight, is not a creative effect; it is making the arithmetic solvable.
6. 6 Speedlights
A flash is not a bright lamp. It is a capacitor discharging through a tube of xenon gas, and the distinction matters for everything that follows.
Charge a capacitor to a few hundred volts, trigger the tube, and the gas ionises and conducts. The energy stored in the capacitor dumps through it in a few thousandths of a second or less, and the tube emits a burst of light that is over before most shutters have finished moving.
Three consequences fall straight out of that. The light is very brief, which freezes motion by itself. The unit needs recycling time, because the capacitor has to charge again. And the output is controlled by how much of the stored charge is allowed through — which is why flash power is quoted in fractions: full, a half, a quarter, and so on down.
Those fractions are stops. Half power is one stop less light than full, a quarter is two stops less. The same arithmetic as everything in module two.
The guide number is how a flash's output is stated, and it is a definition rather than a measurement:
Guide number equals f-number multiplied by distance, at ISO one hundred.
Rearrange it and it becomes useful. If you know the guide number and the distance, the aperture you need is the guide number divided by the distance. A guide number of twenty, at five metres, gives f/four. The same flash at ten metres gives f/two — one stop wider for twice the distance, which is chapter eight arriving early.
Two warnings about guide numbers, both of which are why this course quotes none for any particular unit. They depend on the zoom setting of the flash head, so the same flash has several guide numbers. And they are quoted sometimes in metres and sometimes in feet, which is a factor of about three point three between two numbers printed with equal confidence.
TTL — through the lens — is the automatic mode. The camera fires a brief pre-flash, measures what comes back through the lens, calculates the power needed, and fires the real one, all before the shutter opens. It is fast, it is usually right, and it is measuring reflected light, which means it can be fooled by exactly the things that fool any reflected meter: a white dress, a black suit, a mirror behind the subject.
Manual sets the fraction yourself. It is not more advanced; it is more repeatable. In a situation where the distance and the subject are not changing, manual gives you the same exposure on every frame, where TTL will make a fresh decision each time and can drift.
Bounce is the most valuable thing a small flash can do, and it follows directly from chapter three. Point the flash at the ceiling instead of the subject, and the ceiling becomes the light source. A ceiling is several metres across; at three metres it subtends a huge angle; the light that comes down is soft, and it comes from above and slightly in front, which is roughly where we expect light to come from.
You pay for it. The light travels to the ceiling and back, so it has further to go, and the ceiling absorbs some — commonly two stops or so of loss, though the exact amount depends entirely on the ceiling. And a coloured ceiling tints everything, because you have just made it your light source.
7. 7 Sync
Everything so far has been about the light. This chapter is about the shutter, because the shutter sets a limit that surprises people the first time they hit it.
Recall from module four how a focal-plane shutter works. Two curtains. The first opens, travelling across the frame; after the exposure time, the second follows it and closes. At longer exposures the first curtain finishes its travel before the second starts, so there is a moment when the whole sensor is uncovered at once.
Above a certain speed, that moment stops existing. The second curtain has to start closing before the first has finished opening, and what travels across the sensor is a moving slit. Every part of the sensor still gets the same exposure time — but not at the same time.
A flash lasts a fraction of a millisecond. If it fires while a slit is crossing the frame, it lights only the strip of sensor that happens to be open. The rest of the frame gets no flash at all.
That is the banded frame: a correctly exposed strip and a dark band, with a hard edge between them. It is not a fault in the flash or the camera. It is the shutter doing exactly what it is built to do, photographed by a light that was too quick for it.
The sync speed is the fastest shutter speed at which the sensor is still fully uncovered at some instant. It is a property of that camera's shutter mechanism — how fast its curtains physically travel — which is why this course does not quote one. It belongs to the body, not to the technology. Check yours; it will be marked, and often the camera simply refuses to go faster with a flash attached.
High-speed sync is the workaround, and understanding what it costs stops it being magic. Instead of one burst, the flash fires a rapid sequence of much weaker pulses for the whole time the slit is travelling, so every strip of sensor gets lit as it is exposed.
It works. But you have thrown away the flash's defining advantage — the single brief burst — and you are now using it as a continuous lamp for a few milliseconds. The power drops sharply, often by two or three stops, and the effective freezing of motion is now set by the shutter speed rather than by the flash duration.
Finally, curtain choice. By default the flash fires as soon as the first curtain is fully open: first-curtain sync. With a long exposure and a moving subject, that lights the subject at the start and then records the ambient blur afterwards — so the blur trails in front of the motion, which reads as wrong.
Second-curtain sync fires the flash at the end, just before the second curtain closes. The blur is recorded first and the sharp flash image lands at the end of it, so the trail sits behind the subject, which is what the eye expects.
One frame, one setting, and the difference between a car that appears to be reversing and one that appears to be moving.
8. 8 The inverse-square law
This is the most useful piece of physics a photographer carries, and it takes one diagram.
A light source radiates energy outwards. At one metre, that energy has spread over a certain area. At two metres, it has spread over the same shape scaled by two in each direction — so four times the area. At three metres, nine times.
The same energy over four times the area is a quarter the brightness. So:
Illumination falls with the square of the distance.
In stops, which is the unit that matters in practice: doubling the distance loses two stops. Halving it gains two. Multiply the distance by one point four and you lose one stop, because one point four squared is two.
The counter-intuitive part is where the falloff is steepest, and it is not where people expect. Moving a light from one metre to two metres costs two stops. Moving the same light from nine metres to ten metres — a bigger move in metres — costs less than a fifth of a stop.
The falloff is violent close in and gentle far away. That single fact explains a great deal.
It explains why a subject a metre from a window is beautifully lit and one three metres away looks dull. It explains why, with a close light, the tip of a nose can be a stop brighter than an ear. And it explains why, in a group photograph lit by one close flash, the person at the front is blown out while the person behind is dark — while the same group lit by a light ten metres away is perfectly even.
Which turns into a tool.
Put the light close and the background goes dark on its own. Suppose your subject is at one metre and the wall behind is at three. The wall is three times further, so it receives about a ninth of the light — a little over three stops down. Expose correctly for the face and the wall goes nearly black, with no black backdrop, no second light and no editing. You did it with distance.
Put the light far away and everything evens out. The same subject and wall, with the light at ten metres and thirteen: the ratio is now tiny, well under half a stop, and the background sits at almost the same brightness as the subject.
So the question "how far away should the light be?" has a real answer, and it is not about brightness. Brightness you can fix with power or aperture. Distance decides how fast the light falls off, and that is not recoverable afterwards.
9. 9 Studio light and modifiers
Studio lighting looks like a catalogue of equipment. It is not. Every modifier in existence does one of exactly two things — change the apparent size of the source, or restrict where the light is allowed to go — and once you have that, the catalogue becomes a list of instances.
The lights themselves come in two arrangements. A monobloc puts the flash tube, the capacitor and the controls in one housing on the stand. A pack-and-head system puts the power supply on the floor and runs cables to lighter heads. Monoblocs are simpler and self-contained; packs put the weight low down and can drive several heads from one supply. Both make the same light.
Now the first family — things that make the source bigger, and therefore softer, by chapter three's rule.
An umbrella is the cheapest and quickest: shoot into it and it reflects back, or shoot through it and it transmits. It is large, it sets up in seconds, and it spills light everywhere, because it has no sides.
A softbox is an umbrella with walls. The light can only leave forwards, which gives you a defined rectangle of light and a shadow that stops where you expect. An octabox is the same idea with eight sides rather than four, which makes a rounder catchlight in the eye. A strip is a long thin softbox, used for a narrow vertical band of light down the edge of a subject.
A beauty dish sits between the two families. It is a shallow reflector with a small disc blocking the direct path, so the light bounces off the dish before leaving: larger than a bare head, but smaller and crisper than a softbox. It gives a light that is soft enough to flatter and hard enough to keep some texture.
The second family — things that restrict where the light goes, and change hardness not at all.
A grid is a honeycomb over the front that only lets through rays travelling nearly straight ahead, turning a broad source into a controlled circle. A snoot is a tube doing the same job more crudely. Barn doors are hinged flaps for cutting one edge. A flag is simply something opaque held between the light and the place you do not want lit.
And two that work by what they do not do. A reflector is a white or silver panel bouncing spill back into the shadow side, which raises the shadows without adding a light. Negative fill is a black panel doing the opposite — absorbing light that would otherwise bounce back, making the shadows deeper.
Negative fill is the one beginners never think of, because it involves adding something in order to take light away. In a white room, it is often the most useful thing on the stand.
10. 10 Building a lighting setup
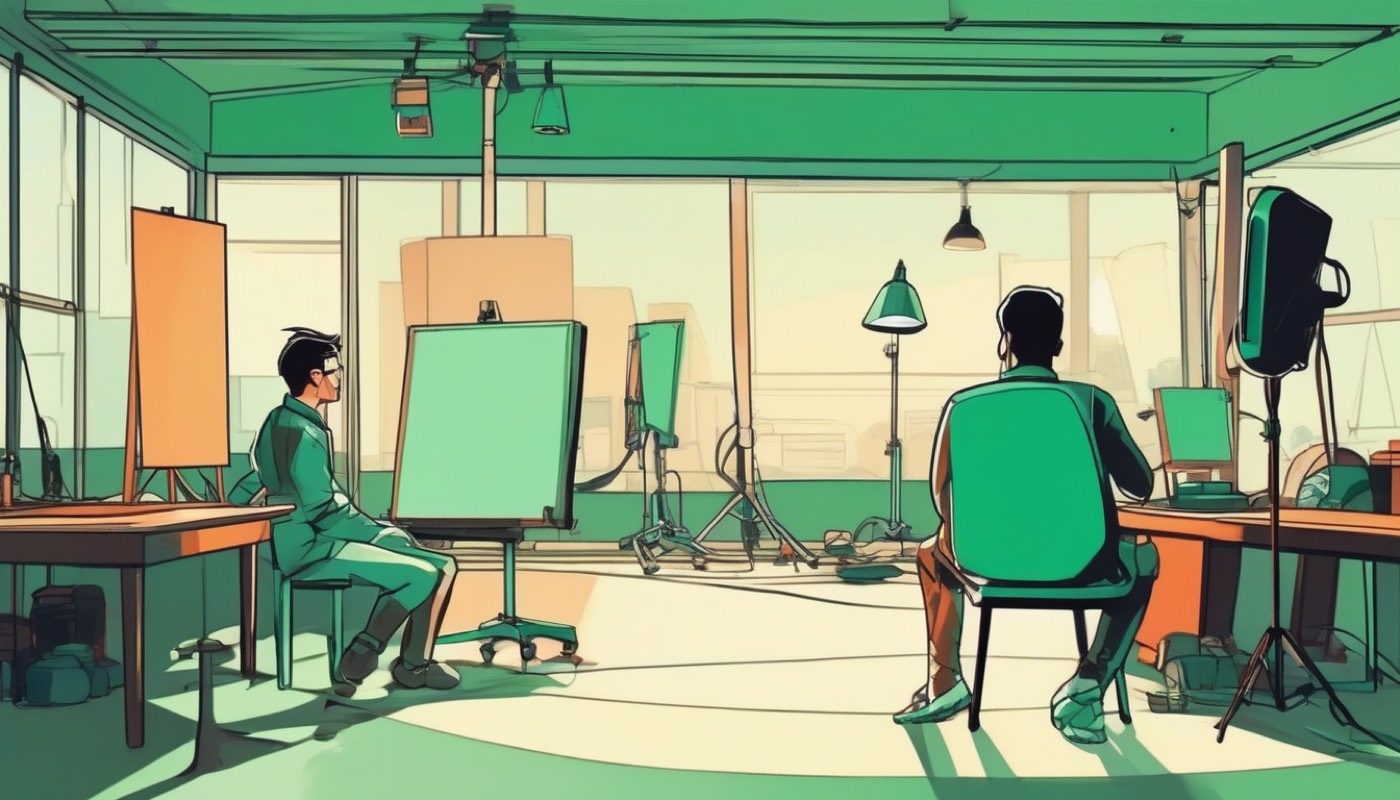
Everything up to here is components. This chapter is the assembly, and it is deliberately built one light at a time — because that is how you learn what each one is for.
One light goes further than anyone expects. A single source, placed deliberately, with a reflector on the shadow side, is a complete portrait setup and has been for a century. The mistake is to add a second light before the first one is right. If the picture is not working with one light, a second light will not fix it; it will give you two problems.
Add the second only when you can say what job it has.
The key light is the one that establishes the shape. It is the light whose shadows you see. Everything else is described in relation to it.
The fill raises the shadow side so that detail survives there. It can be a second light, or a reflector, or a wall — anything that puts light back into the shadows. What matters is not what it is, but the ratio between it and the key.
That ratio is quoted in stops, and it is the single most expressive control in the chapter. Key and fill equal — a one-to-one ratio — gives a flat, even, commercial look. Fill one stop down gives gentle modelling. Two stops down is a recognisably dramatic portrait. Four stops down and the shadow side is essentially black, which is the low-key look.
You do not need a meter to set it. Turn the fill off, expose for the key, then bring the fill up until the shadows look the way you want, and note the difference.
A rim or hair light goes behind the subject, aimed forwards, to separate them from the background. It is the light that stops a dark jacket merging into a dark wall. Use a grid or a flag on it, because it is pointing towards the camera and will flare the lens given any chance at all.
A background light lights the background rather than the subject — a pool of light behind the head, or a graduated wash. It is the light that stops the backdrop looking like a sheet of paper.
Which gives the order of assembly: key, then fill, then rim, then background. Each one answers a question the previous one raised, and at every stage you can stop.
Balancing flash against daylight is the last piece, and it is where the two halves of this module meet.
The trick is that your camera has two independent exposure controls here, and they do different jobs. The shutter speed controls the ambient light and does nothing to the flash — because the flash is over in a fraction of a millisecond, so whether the shutter stays open for a two-hundredth or a sixtieth, the flash contributes the same. The aperture controls both.
So the working method is: set the aperture for the flash, then set the shutter speed for the background — anywhere up to the sync speed from chapter seven.
Want the sky dark and dramatic behind a flash-lit subject? Use a faster shutter. Want the room to read naturally behind the subject? Use a slower one. The subject does not change, because the flash does not care about the shutter.
That is the whole module in one setting. Light has intensity, direction, colour and quality; you control quality with apparent size, colour with temperature and gels, falloff with distance, and the balance between two sources with the one control that only affects one of them.
None of it requires expensive equipment. All of it requires deciding what you want the light to do before you turn anything on.
Sources and credits
Primary sources
- NASA NSSDC, 'Sun Fact Sheet', https://nssdc.gsfc.nasa.gov/planetary/factsheet/sunfact.html —. Apparent diameter from Earth: 1,919 arcseconds mean, 1,887 minimum, 1,952 maximum; distance 149.6 million km mean, 147.1 / 152.1 million km at perihelion and aphelion.
Not regulated financial advice.